How To Handle Multiple Checkboxes From Controller In ASP.NET MVC - Sample App With New Stuff After MVC 3 Tools Update
Related Posts
Checkboxes are so handy and easy to use. But ASP.Net MVC is a framework which stands http verbs so there is no OnClick event for buttons. Actually, there are no buttons! As you know buttons are rendered as <input value=”submit” /> native html code and .net assign some values for those input to handle them on the http post. Handling checkboxes with web forms are easy along with code behind. There is no headache there (There is no headache in MVC for me but some think that way)
But what about ASP.NET MVC? How can we handle checkboxes, which are inside a view, from controller? The solution is easier than you imagine. In this blog post, I will demonstrate a simple scenario about how to delete multiple records with the help of checkboxes.
In our sample app, I am gonna be using new things on .Net such as EFCodeFirst, EntityFramework.SqlServerCompact, MvcScaffolding. The idea is simple : we will have a simple contact form and a backend to manage those messages.
At its core, this blog post intends to show the way of handling multiple checkboxes on ASP.NET MVC but it is also a good example of how to create an ASP.NET MVC app from scratch. As you will see, we will see MvcScaffolding many times. I'll go through the basics of it but for more information, there is a blog post series on Steve Sanderson's blog:
Let the code begin…
Fist thing is always first and this thing is File > New > Project on Visual Studio world. I am gonna create a new ASP.NET MVC 3 Internet Application with Razor View Engine. I am also going to create a Unit Test project related to my MVC project because I am not a bad person (on Scott Hanselman’s point of view ![]() )
)
BTW, Don’t worry, I am not gonna put the three circles here which explain CLEARLY what MVC framework is and blows our minds![]()
Nuget Packages is First Thing to Go With
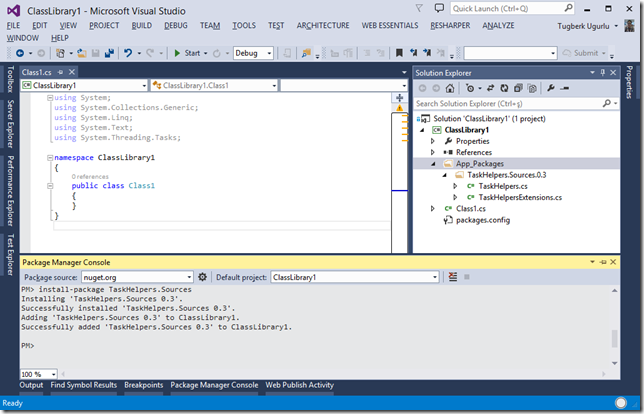
But before getting our hands dirty, bring up the PMC (which stands for Package Manager Console [I made it up but it might be the actual abbreviation. ![]() If it is not, use it to make it legit!]) on Visual Studio 2010 to get the following packages;
If it is not, use it to make it legit!]) on Visual Studio 2010 to get the following packages;
MvcScaffolding : A fast and customizable way to add controllers, views, and other items to your ASP.NET MVC application
EntityFramework.SqlServerCompact : Allows SQL Server Compact 4.0 to be used with Entity Framework..
I am here using ASP.NET MVC 3 Tools Update so I got EntityFramework Nuget Package out of the box for support of Code First workflow for ADO.NET Entity Framework. If you are not using this update, simple install EntityFramework package from PMC or Add Library Package Reference dialog box on VS.
Now, we have built our project environment and ready to hit the code.
Be Cool and Use the PowerShell
I am no PowerShell expert. Even, I am no good at that thing. But I am enthusiastic about that and I am learning it. So in our sample project, I will use MvcScaffolding to create nearly everything that I can. I have two options here;
1 – To use GUI to scaffold my crap. This option comes with ASP.NET MVC 3 Tools Update. I am not going to be using that option.
2 – By using PMC which is a lot cooler than the GUI. I’ll be using this option along the way.
Firstly, we need our model classes. Below code includes all of model classes that we need for this small project;
using System.Collections.Generic;
using System.ComponentModel.DataAnnotations;

namespace ContactFormWithMultipleCheckboxApp.Models {

    public class Product {

        public int ProductId { get; set; }
        [Required, StringLength(50)]
        public string ProductName { get; set; }
        public string Description { get; set; }

        public virtual ICollection<Message> Messages { get; set; }

    }

    public class Message {

        public int MessageId { get; set; }
        public string From { get; set; }
        [Required]
        //below one is to validate whether the e-mail address is legit or not
        [RegularExpression(@"\w+([-+.']\w+)*@\w+([-.]\w+)*\.\w+([-.]\w+)*", ErrorMessage = "Email address is not valid")]
        public string Email { get; set; }
        [StringLength(100)]
        public string Subject { get; set; }
        public string Content { get; set; }

        public int ProductId { get; set; }
        public Product Product { get; set; }

    }
}
Scaffolding Controllers, Views and Repositories, DBContext (Entity Framework Code First Database Context Class)
To do so, bring up the PMC and type the following code;
Nice ! We have what we need so far. But not so useful. When we open up the product controller file, we will see that controller actions directly talking to Entity Framework which is not so handy in terms of Unit Testing. What can we do here. MvcScaffolding has a nice solution for that. We will just rescaffold the controller for Product class and at the same time we will create repositories. But by default, MvcScaffolding doesn’t overwrite any files that already exist. If you do want to overwrite things, you need to pass –force switch. To do so, we will do the following PS command on PMC;
Cool. We have our core logic for backend system. Do the same for Message class with following one line of PS code;
Rock on ! Perfect so far. When we fire up our app, Sql Compact database will be created for us inside our App_Data folder. Now go to the Products directory and add some products and then go to the Messages directory on the address bar.
There is one thing that I would like to share here. When you go to your _CreateOrEdit.cshtml file inside Views/Messages folder, you will see that the following code used for creating relational dropdownlist.
<div class="editor-field">
    @Html.DropDownListFor(model => model.ProductId, ((IEnumerable<ContactFormWithMultipleCheckboxApp.Models.Product>)ViewBag.PossibleProducts).Select(option => new SelectListItem {
        Text = Html.DisplayTextFor(_ => option).ToString(),
        Value = option.ProductId.ToString(),
        Selected = (Model != null) && (option.ProductId == Model.ProductId)
    }), "Choose...")
    @Html.ValidationMessageFor(model => model.ProductId)
</div>
Well, this code does not work quite fine. I don’t know why and I didn’t dig into that. I just changed the code with the following one and now it works quite well. Nevertheless, MvcScaffolding has done its part very well.
<div class="editor-field">
    @Html.DropDownListFor(model => model.ProductId, ((IEnumerable<ContactFormWithMultipleCheckboxApp.Models.Product>)ViewBag.PossibleProducts).Select(option => new SelectListItem {
        Text = option.ProductName,
        Value = option.ProductId.ToString(),
        Selected = (Model != null) && (option.ProductId == Model.ProductId)
    }), "Choose...")
    @Html.ValidationMessageFor(model => model.ProductId)
</div>
Now, we are at the part where we should implement the logic of our core idea : deleting multiple records from the database. I have created several Messages now and our list looks like as below;
Hmmm, looks like Fraud has been spaming us with very old-fashioned way. Well, better delete them from database. They are garbage, right? But that’d be nice to delete them all by one click. Let’s make that happen ![]()
Open up the Index.cshtml file inside Views/Messages folder. See the change what I have done on the lines 4,5,6;
@foreach (var item in Model) {

    <tr>
        <td>
            <input type="checkbox" name="deleteInputs" value="@item.MessageId" />
        </td>
        <td>
            @Html.ActionLink("Edit", "Edit", new { id=item.MessageId }) |
            @Html.ActionLink("Details", "Details", new { id=item.MessageId }) |
            @Html.ActionLink("Delete", "Delete", new { id=item.MessageId })
        </td>
        <td>
			@item.From
        </td>
        <td>
			@item.Email
        </td>
        <td>
			@item.Subject
        </td>
        <td>
			@item.Content
        </td>
        <td>
			@Html.DisplayTextFor(_ => item.Product.ProductName)
        </td>
    </tr>

}
I have added an input whose type attribute is checkbox for every generated record. So what does this think do? It enable us to catch the selected checkboxes and relate them to a record with the MessageId property. But we are not done yet. we will create a PostAction method for Index view but we are not gonna do that by typing. We will use PMC again because it’s cooler ![]() Type the following;
Type the following;
Now we have our Post Action Method. The last view of this method will look like this;
        [HttpPost, ActionName("Index")]
        public ActionResult IndexPost(int[] deleteInputs) {

            var model = messageRepository.AllIncluding(message => message.Product);

            if (deleteInputs == null) {

                ModelState.AddModelError("", "None of the reconds has been selected for delete action !");
                return View(model);
            }

            foreach (var item in deleteInputs) {

                try {

                    messageRepository.Delete(item);

                } catch (Exception err) {

                    ModelState.AddModelError("", "Failed On Id " + item.ToString() + " : " + err.Message);
                    return View(model);
                }
            }

            messageRepository.Save();
            ModelState.AddModelError("", deleteInputs.Count().ToString() + " record(s) has been successfully deleted!");

            return View(model);
        }
So here what we are doing is simple. We are retrieving selected checkboxes and deleting the records from database according to MessageId property. Also, I am doing something bizarre here on the 26. I am passing the confirmation message to ModelError to view it afterwards. Probably not the smartest thing on the planet but it works for me.
Finally, add the following code to your index view page;
@using (Html.BeginForm()) {
<div>

    @Html.ValidationSummary()

</div>
<div style="float:right;">


        <input type="submit" value="Delete Selected Values" />


</div>

@*Add this below curly brace at the end of the page to close the using statement for Html.Beginform()*@
}
Fire up the project by clicking Ctrl + F5 and go to the Messages directory. You will end up with a web page which is similar to following left one. Then, select the messages which have come from Fraud who is our old-fashioned spammer. After selecting the records you would like to delete, click the button on top-right side.
Bingo ! We are done here.
Of course this way is not the nicest way for this type of action. The better solution would be doing this with Ajax or JQuery post to server and removing deleted record rows with nice animation.
So why didn’t I do that here? Because I don’t have enough time for now ![]() I wanna get this post up and running quickly. So, this is it for now
I wanna get this post up and running quickly. So, this is it for now ![]() Feel free to download the source code and use it anywhere you like.
Feel free to download the source code and use it anywhere you like.
